Wednesday 26 November 2014

Year 9 Sheep Heart Dissections

My year 9 classes finally got the chance to dissect pig and sheep hearts. 

9KEm and 9TMn got to do it as part of the new 'Me, Myself and My Environment' unit, and even though we have run out of time to finish that unit we didn't want 9PLa, 9PTt or 9RTd missing out on this fun and practical learning experience!


We had a look at the aorta, as well as the left and right atria, ventricles and chordae tendineae.

Students were really good at remembering which side of the heart is bigger and has thicker walls of muscle, and explaining WHY!  (The left side is bigger and more muscular because it pumps blood around the whole body, while the right side only pumps blood out to the lungs and back).


Here is the video of their dissections - listen carefully as James' from 9RTd gives an explanation halfway through:


Wednesday 12 November 2014

Tamaki College Presents: Science Hunger Games

Year 9 lines up outside the door, ready for another science lesson.

"What are we learning about today again?" asks Latiume.

"I don't know... microbes maybe?" answers Ricky.

Tyrone is not listening to his classmates chatter. 

He is thinking about the Hunger Games movie coming out this month... will it be as good as the first and second movies? What's going to happen in this one? Is Peeta really a bad guy now? 

The classroom door opens...


Friday 12 September 2014

Students Becoming the Teacher

Yesterday at the end of 9PLa's Science class Gustavo and Rongo showed me how to make a gif from a youtube video.  

Rongo had been using the gif as the background of a Google Presentation, and it looked really, really cool! 

I asked the boys if they could make a set of instructions to share how to do this, so here they are:


HOW TO MAKE A GIF - BY GUSTAVO


Step 1.

Find a video on YouTube that you would like to convert into a gif.

Screenshot 2014-09-11 at 8.38.05 PM.png


Step 2.

Insert these three letters (gif) after the www. in the URL

Screenshot 2014-09-11 at 12.34.06 PM.png


Step 3.

Pick a start time on the video for the gif you are creating

Screenshot 2014-09-11 at 8.46.58 PM.png

LIke this:

Screenshot 2014-09-11 at 8.51.05 PM.png


Step 4.

Set a time duration for your video.

Screenshot 2014-09-11 at 8.53.08 PM.png


Step 5.

Create gif.


Outcome:

Fresh gwuac.gif


Sunday 31 August 2014

Tamaki College goes to the Science Fair


On Friday 29th August I had the privilege of transporting 9KEm to their Science Fair competition at Fickling Convention Centre in Three Kings.

Students had spent weeks planning, preparing, collecting data, analysing, concluding, printing and pasting to get their projects finished in time for the school science fair.

Ms Smallwood held this in S3 last Friday, and students were able to practice their interview skills as some guest judges walked around, asked them about their projects and gave them some feedback. 

All of the projects had such creative names and they were all so different, the guest judges were all very impressed. Some of the projects included finding out which type of bowl degraded the fastest (interestingly, not the one called the 'biodegradable' bowl!), which type of bowl helped whisk egg whites the fastest and the highest, which fertiliser helped plants grow the tallest, which genre of music caused bacteria to grow the most, whether texting affected finger dexterity and which soil is most affected by liquefaction?

However, even after their practice the week before some students were still nervous on the way to meet with the real judges - "excitedly nervous," as one of them put it. Would the real judges ask them even harder questions? Would they like their ideas? 

Watch the video below to find out from students as they return from the judging room:


A big huge thank you to Ms Smallwood from all the Science staff and all the students! Ms Smallwood single-handedly organised the science fair students and projects at Tamaki College. Thanks for all of your hard work and extra after-school efforts! 

Finally, in breaking news, it appears that the dedication of Ms Smallwood and her science stars has paid off! Hopefully the science fair students have been checking their results on this website - but I will leave it to Ms Smallwood to announce on Monday. Congratulations Tamaki winners!

Monday 25 August 2014

Students Are So GOOD With Technology!

During the Chemical Reactions unit 9PLa demonstrated once again how capable they are with technology. They have used it in many different ways to share their understanding!

This is a Prezi made by Viola


Students in 9PLa also all made their own websites - I am not sure the general public will have permission to see them though.  If you click on the screenshot of the website below, you will hopefully be taken to a students' site and be able to see all their work, explanations, videos and the Do Now's they created for others.


If the picture doesn't link to Gustavo's site, click here
If that doesn't work, then you don't have permission to view it. 


One student in 9RTd even filmed their own video during the unit, edited it and added a great backing track - a rap about safety in science! Thanks Ricky.


As always, follow this link to see the gorgeous work my three Year 9 classes have been creating, and feel free to explore my site :) 

Sunday 24 August 2014

Making Ice-Cream - Easy!

All three of my Year 9 classes finished their Chemical Reactions unit on Friday, and we decided it was time for a treat for working so hard!

9PLa and 9PTt got to make ice-cream after Latiume sent me 
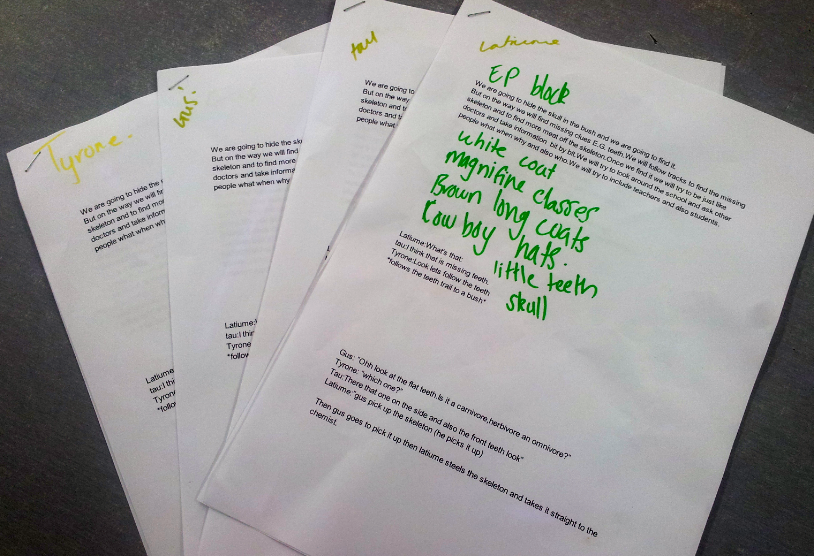
this link and requested to make ice-cream, and 9RTd got to launch rockets with Mr Grace in their Friday class!

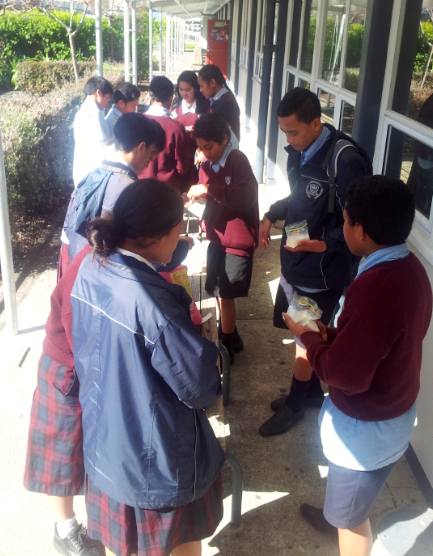
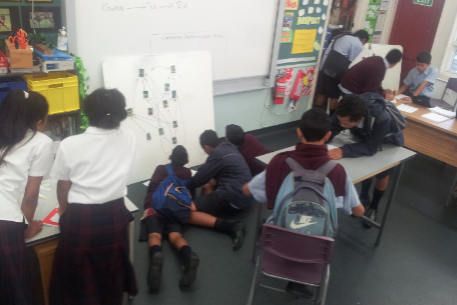
I was so impressed by how 9PLa and 9PTt worked together to help set up their bags of ice-cream, which you can clearly see in the photos below. The recipe for ice-cream is not difficult, and some of the students even said they would make it at home again!

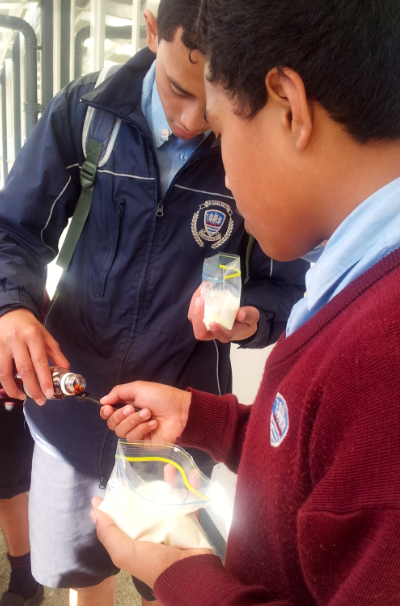
Everybody helping one another with the measurements - it is difficult to do alone!

Trey helping Lasa measure the vanilla essence.

Everyone doing the measurements.

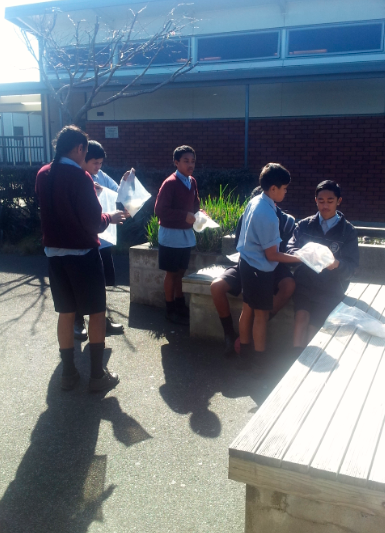
Once the two bags were all set up students had to keep shaking them to make their ice-cream creamy!

Suzie enjoying her ice-cream in the sun.

Latiume and Tyrone were pretty happy with the outcome of their effort.


Reactants for the small ziplock bag:
1/2 cup blue milk
2 tablespoons of sugar
1 teaspoon of vanilla essence

Reactants for the larger ziplock bag:
Three handfuls of ice
1/4 cup rock salt

Method:
1.   Place all of the reactants for the small ziplock bag into it.
2.    Make sure the small ziplock bag is COMPLETELY sealed.
3.  Place all of the reactants for the larger ziplock bag into it.
4.  Place the smaller ziplock bag into the larger bag. 
5. Shake the larger bag from the corners, try not to touch the ice too much - it's very cold!
6.  Shake until you can feel the milk has hardened into an ice-cream-like texture.

Product:
Vanilla Ice Cream

Word Equation:
milk+sugar+vanilla essence --> vanilla ice-cream

Conclusion:
The science behind this chemical reaction is that mixing ice and salt causes the ice to be able to melt into water while it is still at the temperature of ice - below 0 degrees. Try not to touch the freezing cold ice-water while shaking the bag, as it can cause second or third-degree burns similar to frostbite. The ice-cream tasted really nice, but some bags had a slight salty taste because there was some salty water sitting in the crease of the ziplock bag, which fell into the ice-cream when it was opened! 9PLa would advise you to wash the bag before opening it, while I quite enjoyed the slightly salty ice-creamy taste; kind of like salted caramel. Yum!

Friday 25 July 2014

A Student Shines at the Halfway Point

Yesterday I set 9PLa and 9RTd an assessment as we are now halfway through the Chemical Reactions unit. 

Students chose whether they would like to work on paper, Google Presentations, Wix websites or Prezi. Most students chose to make a Google Presentation or Prezi, 2 students chose Wix websites and there are a few working on posters.

I set out Achieved, Merit and Excellence criteria, and students chose which grade they would like to aim for and got to work!

One student went home and kept working on their project, and here are some screenshots of her beautiful presentation, handed in days early and to a very high standard! Check them out below:


Here is the Achievement Criteria; what is the highest grade she met all the criteria for?

Achieved
  1. Include a safety slide at the start of your prezi. It must have information about:
    1. safety around acids and
    2. safety around bunsen burners.
  2. Include a slide with a definition of a chemical reaction. This slide must:
    1. be written in your own words
  3. Include a slide that explains the difference between physical and chemical changes. This slide must include:
    1. Whether or not a new substance is made
    2. Whether or not the change is reversible
    3. What you might observe (see) during a chemical change
    4. What you might observe (see) during a physical change
  4. Include a slide about 2 chemical reactions we have done at class, or others you do all the time at home.
    1. You may or may not want to include photos or videos from class
  5. Include a slide about the chemical change that happens when a potato is cooked
    1. Identify the reactants and the products

Merit
  1. Same as Achieved
  2. Same as Achieved
  3. Same as Achieved
  4. Include a slide about 2 chemical reactions we have done at class, or others you do all the time at home.
    1. You may or may not want to include photos or videos from class
    2. Explain how you knew they were chemical or physical
  5. Include a slide about the chemical change that happens when a potato is cooked
    1. Identify the reactants and the products
    2. Explain how you tested whether there had been a chemical change

Excellence
  1. Same as Achieved
  2. Same as Achieved
  3. Same as Achieved
  4. Include a slide about three chemical reactions we have done at class, or others you do all the time at home.
    1. You may or may not want to include photos or videos from class
    2. Explain how you knew they were chemical or physical
  5. Include a slide about the chemical change that happens when a potato is cooked
    1. Identify the reactants and the products
    2. Explain how you tested whether there had been a chemical change
  6. Include a slide about the chemical reaction between iodine and starch
    1. Identify the reactants and the products
    2. Explain what is happening during the reaction
    3. Discuss how you could use iodine to test another food; write a hypothesis of what you think would happen and a method of how you would test it.  

Wednesday 23 July 2014

Back with a bang!

9PTt has just started their Chemical Reactions unit, and I showed them an impressive and scary (for me to light) chemical reaction. It takes place in a ground flask, with the class lights turned off for maximum effect!

1 tsp boric acid + 100mL methanol --> thimethyl borate

The boric acid and the methanol react together to produce trimethyl borate, which produces a beautiful green flame when it is lit on fire.

Reactant + Reactant --> Product

Katherine and Caroline were kind enough to film the experiment for their class.


Wednesday 25 June 2014

Year 9 Visits the Stardome

On Friday we took all of Year 9 off to Cornwall Park to visit the Stardome. 


Students got to walk to the top of the volcano and look around. Students weren't looking forward to the big walk up the hill, but there was a sense of achievement and success when they reached the top and were able to look around!   

We then returned to the Stardome for a show on the sky screen and a talk.  My group watched a show called 'Two Pieces of Glass' about the history of the telescope and how far it has developed with todays technology. It also taught us about the discoveries that telescopes have helped with.

This is a beautiful video of the night skies from a mountain in Spain for any students who were amazed by how big our universe is. 

After the show students got to explore the different activities in the foyer of the Stardome. There was a scale that measured their mass and calculated how much they would weigh on different planets and stars (billions of kgs on a neutron star!), real space suits and telescopes, a rolling-ball demonstration of gravity and a sphere that showed what the different planets look as they rotate, among other things. 

We then went and listened to a talk about how much fuel and speed space shuttles need to get up into outer space! One thing I remember is that at the very start of a space shuttle launch, by the time the back of the space ship has reached the point where the front of the space shuttle was (by the time it has travelled its own length) the shuttle is already travelling at 100km an hour! Students in my group were especially amazed to see a video by Chris Hadfield about how astronauts brush their teeth in space!  


We finished the day with some free time at lunch - I think the rugby game that happened on the field involved most of the boys in Year 9!


Sunday 15 June 2014

Year 13 Bio Goes to Liggins

On Friday five Year 13 students went to the Liggins Institute at the University of Auckland. The lab was run by a teacher who has previously taught at Tamaki College, so he knew all of our students already. 

Students learned about how important the prenatal environment is - how mothers can best prepare their unborn children for life, and that Liggins is helping to study how the prenatal environment can correlate with some diseases that appear during middle age.

Next students got to practice using pipettes and setting up samples for PCR.  Students then got to set up and run gel electrophoresis to try and work out how many base pairs were in a given sample of DNA.  Then it was time for lunch!

After refilling on Subway sandwiches, students got to meet some real scientists and ask them questions about their research and their time at university. One scientist surprised the students by talking about how her programme had allowed students to work with cadavers - people who had died and donated their body to science.  There were a few questions asked after that!  After the scientists left it was time to look at a photograph of the gel electrophoresis results and see who had run it properly!

As we finished up, the teachers stood to one side chatting about teaching and learning platforms and biology etc etc... the students completely blew us away by spontaneously moving the lab chairs into a circle and chatting to students from Sir Edmund Hillary Collegiate! It was so nice to see, and there was  a LOT of laughing. 

Here's a video of the trip:


Wednesday 11 June 2014

PTt Begins the Web of Life

Evon would like to share her experiences from the beginning of the Web of Life unit:


Know how to make a cup grass thing.
1 part: was to get a cup.
2 part: to get a stocking.
3: fill it with seed and next fill it with soil and after wet all did that we decorate the cup and dress it up.  
Each day one person had to water the grass. 

A few weeks late we wondered and the grass grown and we could cut the hair of the grass, make it it into a boy or a girl.

Day 1: Loa is the water monitor on this day. The grass has started to grow from the grass seeds!


Day 8: Siupeli and Phoenix are surprised how much the grass grew over the weekend.


Day 8: Cameron and Jonive investigate the rest of the critters' growth.


Day 12: Cameron cut his grass critter's hair very professionally!


Day 12: Loa is holding her grass critter with it's new haircut.


Day 12: The critters all look great after their haircuts!


Wednesday 4 June 2014

Movies! Migration and Skeleton Teeth...

The Web of Unit life has come to a close, and it finished with students creating, creating, creating! Most of 9PLa decided to work in groups to create three videos (1 on migration, 1 on the teeth of herbivore, and 1 about marine food webs), while 2 boys chose to create a comic strip each. 

Comic strip about pests and native animals coming along...

Students wrote their own scripts, practiced, told me which props they would like, and then off they went to film! Some groups were totally independent while some others did need me to come and film for them. I was really impressed by them as this is the first time some of them have made movies, and definitely the first time I've let them take full control.

Script for the food web video in progress...

Scripts for all the actors and the list of props required...

I did the editing for 2/3 of the videos (we ran out of time - exams are coming next week and my learners need to start revising!) and because I have them on my laptop already, here they are! 

Watch them in order - the middle video is a trailer for the last video...

Tremayne interviews Austin the Migration Expert

A trailer for The Skeleton Mystery..

The movie: The Skeleton Mystery

Saturday 31 May 2014

Year 11 Explaining their Learning

Year 11 are working on an Achievement Standard about the properties of metals and their uses in society. So far we have done some reactions of metals with acids and metals with oxygen... 

For the last 2 days we gave the class time to summarise their observations and what they have learned about the reactions of metals. Some very creative pieces were made, with some students opting to use digital media and others choosing coloured paper and pens.

Some students also opted to collaborate on their presentations while others chose to keep their work to themselves. 

Click on the picture below if you wish to view the presentations up close.

Please also feel free to comment here on the students' work, I'm sure they would love feedback on their efforts.


Thursday 29 May 2014

9RTd Creating...

Today 9RTd started on their 'create' week as well. Two groups chose to make a MRS C GREN video... 


Wednesday 28 May 2014

Students Getting Creative

Year 9 classes 9PLa and 9RTd have reached the 'create' phase of the Web of Life unit! 

There are a lot of different creation activities students can choose from, covering a wide range of content with different styles of creation for students to express their understanding.

Clicking on the picture below will take you to the class Web of Life Creation page, where you can explore the different activities available to the students, check out the criteria students have to meet for each activity, and view the links students have shared of the work they have finished :) 


Two groups of students chose to make a video about MRS C GREN yesterday; two boys chose to make a video in the last 5 minutes of class after they made a poster about trophic levels!  Here is their final product:


Friday 23 May 2014

Year 11 Reactions of Metals with Oxygen

Today (last period Friday) the Year 11 Science class did a practical; they combusted different metals in oxygen! Some of them enjoyed showing my laptop what they were doing - I think we have some future TV presenters in class.

Here's the video of what they did:


No Year 11's (or teachers) were harmed in the making of this production! 

Thursday 22 May 2014

Science Roadshow comes to Tamaki College

The Science Roadshow (sponsored by the Ministry of Education) came to Tamaki College today. Year 9 classes each spent two periods playing with the exhibits, learning off the Year 10 guides, asking questions and watching two live demonstrations.

Just watch the video...


Tuesday 20 May 2014

9PLa Making Food Webs

9PLa used these sets of cards to create a huge, complicated food web.

They worked in two teams and used the information on the back of each card to work out the relationships in the food web. There were arrows showing the flow of energy from prey to predator all over the place by the time they had finished!! 


If I was going to repeat this activity I would hand out a card to each student and make sure they know what their 'character' eats before letting them create the web. That way everyone will have information to contribute and involvement would be more equal. 

In the last 5 minutes of class I challenged 9PLa to see who could write down the most food chains based on the food web they had created. Then they posted their responses to me in the class postbox.  


One student was so keen to get the most chains that I agreed to photograph the food webs and email them to him - but I wrote this blog instead! I hope you can see all the different names in the pictures Tyrone - if not then you can open the cards here and make your own food web instead :) 


Friday 16 May 2014

Awe-Inspiring Work by Year 9PLa

Year 9 has been learning about what makes living things alive, animal diets and adaptations that help living things survive. 

I have simultaneously been using the time to see how students learn during the Manaiakalani 'Learn,' which is a little passive but sometimes necessary to get content across. Students have listened, done research, watched videos, talked to each other, completed quizzes, played games, and commented on their learning. They have been keeping track of this in their Google Doc as a kind of learning log. 

However, students were getting a little bored with this. One brave student offered some quiet feedback to me and said there was "too much to learn" and we had been doing "too much writing," so we thought it would be a good idea to have a break from new content and 'Create' something that showed off how much they understood. Each student picked their favourite Mammal and set about creating a profile for them. 

We had some spectacular work produced. We let students choose what media they wanted to use to create... here is a freehand poster about Cats.


Most other students chose to use Google Presentations and two students chose to use Wix to create their own websites! 

Click the Garfield poster to be taken to all four great examples of student work, or click here to see a student-made site about lions, or here to learn about pandas from my class! 

Maybe I should try animation with this class of superstars one day soon... 


Tuesday 13 May 2014

9PTt "Polluted Water" Puzzle

9PTt has been learning about separating mixtures and solutions using decanting, filtering and evaporating. There's only so much you can learn from listening to a teacher, so I decided to challenge them practically. 

I set up large beakers containing rocks, sand, salty water with blue food colouring and topped off the "polluted sample" with a layer of baby oil. Students had to work out how to separate the different parts of the sample to find out how much salt was in the water. 


Students decanted the salty liquid out of the beaker, leaving behind a heavy layer of rocks and sand. There was still some sand floating in the liquid, so students had to filter the liquid through a funnel and filter paper. 

Next students poured the salty liquid into a funnel while holding it closed with their thumb. They (mostly) waited patiently until all the oil rose to the top then let the water out from underneath, leaving the oil behind. 

I didn't quite trust that all the oil had been removed from the sample and didn't really feel like setting anything on fire today, so I collected back their samples and distributed a new one with only salt and water in it!


G opening the bunsen burner hole to get a blue flame

Students then evaporated off the water using an evaporating dish heated over a bunsen burner to find out how much salt was in the solution. There was a lot of engagement during this practical, and I feel that students benefitted a lot from being able to do the separation themselves.  

  Tomorrow the students are going to learn how to separate mixtures using chromatography and make some cool chromatography flowers while they're at it!